Sunday, November 17, 2013

Doctor Who Quilt Update #10

I can't believe I actually managed to get a little sewing in this weekend. I been wanting to get to the construction of the Gallifreyan text image strip for a while now and made a good start of it this afternoon.


Beginning of Gallifreyan text image strip on the right


I plan on using a current image of Matt Smith - yes, Matt, not the Doctor - at the top of the strip. And, yes, a current image with his short hair. I like both the Doctor's floppy hair and Smith's short hair. I know some fans wish he'd grow his hair back, But Doctor Who is all about change, right? Besides, I think Smith should be able to wear his hair any way he wants. So, short it will be. I'm not eliminating the option of another image of him as the Doctor, of course. 

I still have to add a dark blue star strip at the bottom of the quilt, below the TARDIS and bow tie strip, so that the dark blue forms a frame around the TARDIS and bowties before I can add the text strip on the right. That means I also have to figure out what to do with that bottom right corner. I have four Gallifreyan text images left to form a strip for the bottom of the quilt. With four text images left, I will have about 14 inches remaining to finish the bottom strip, plenty of room for an 11th Doctor image in the lower left. There is also the possibility that something will arise in the 50th Anniversary episode that just HAS to be part of this quilt. The same thing could happen with the Christmas special. So, I'm holding my options open for that bottom strip. Maybe, this quilt won't be done until after the first of the year!

There's one more thing I've been considering. The quilt is tall and narrow. I have quite a bit of the planet fabric that I bought for the back of the quilt. I could add wide sections of planet fabric to the sides, bringing those planets to the front side of the quilt. I don't want to make it too big, though, because I want to use the remaining Doctor's plaid jacket fabric, on the diagonal, to bind the quilt edges when I'm done. 

When the binding's finished, I have to apply a label to the back. I've been playing around with possibilities. But, what image to use? What to say on it? Here's my second draft. It has a picture of River and the Doctor, from "The Name of the Doctor," just because River is my favorite of the Doctor's companions.


The Doctor's and River Song's last kiss from "The Name of the Doctor"
 

I know some fans aren't that excited about her, but it's my quilt, so I get to choose!

#SaveTheDay


Sunday, November 10, 2013

Doctor Who Quilt Update #9

OK, so maybe I won't do a wide section with appliqued Gallifreyan images like I described in Update #8. I was having trouble visualizing and liking the design. Maybe, instead, I'll make another strip of squares-in-squares to match the strip of bowties on the left. Yeah, I think that's it.

I've already added a top strip to bring the bowtie count to eleven for the 11th Doctor, with two Gallifreyan images to complete the strip.


Top row added above the TARDIS.
 
Today, I finally printed the rest of the Gallifreyan text images. They're ready to be cut out (5-inch squares) and made into a strip. 
 
 
 Gallifreyan text images ready to cut out


Instead of the blue star fabric surrounding the bowties, the text images will be surrounded by solid red, the same color as the bowties themselves. I have twelve images right now, plenty to create a strip on the right as well as at the bottom. 
 
I had hoped to finish the quilt for the 50th Anniversary on November 23, 2013. But, on second thought, suppose there are images or short quotations from the anniversary episode or the Christmas special that I want to include? I realized yesterday that it might be best NOT to finish it off in time for the 50th!


Wednesday, October 30, 2013

Baking for Doctor Who

On Facebook, some Whovian friends and I were talking about having delicious goodies while watching the Doctor Who 50th Anniversary special on November, 23rd. One of those goodies is Jammy Dodgers, a delicious shortbread cookie with red raspberry filling. Here in the U.S., people either have to buy them on a UK website, buy them from someone who has imported them into the U.S., or bake them. DIY is always my first choice!


A batch of homemade Jammy Dodgers


Here's my recipe for anyone who might be interested.

JAMMY DODGERS (DOCTOR WHO)
¾ cup sugar
2 sticks butter, softened
2 ¼ cups flour
Seedless red raspberry jam
You will need a linzer cookie cutter. The set I bought is at http://www.amazon.com/gp/product/B003CN5SUO/ref=oh_details_o00_s00_i00?ie=UTF8&psc=1, but there are other sets, too.
Cream  butter and sugar together until light and fluffy. Add flour and  mix to make a soft dough.
To roll and cut dough: Roll the dough out half the dough at a time to about ¼  inch thick. Cut cookies into about 2 ½ inch circles. Half the cookies should have their centers cut out as well for the tops. Use a Linzer cookie cutter. Lift the cookies with a thin spatula and place on a baking sheet, being careful not to distort the center-cut cookies.
From my experience: (1) It’s a little tricky to get the heart cutout out of the center. I find that if I pick up the cookie with the spatula and place it in my other hand with my fingers spread out a little, the heart will drop between my fingers, maybe with a little prodding. Then, I have to be careful not to distort the heart shape when I put the cookie on the baking sheet. Works for me! And, if it doesn’t work, I put the cookie in the scrap pile and re-roll! (2) It’s better to bake the bottoms and tops on separate sheets because the bottoms need more time in the oven.
Bake at 325° for 10 minutes; cookies should still be very light, just starting to get golden around the edges. Ovens are different, so keep watch. Do not allow cookies to darken. Allow to cool before removing cookies from the sheet.
Spread some  raspberry preserves on the full cookies (bottoms) and top with the cut cookie (tops), allowing the jam to fill the cut center. Stack prepared cookies carefully on a plate, keeping them from touching the jam  cut centers of any cookies below them. Refrigerate uncovered until jam is set. Store in an airtight container in the refrigerator.
Makes about 24 sandwich cookies.


Oh, dear! Now I want to make some right now!


Saturday, October 26, 2013

Doctor Who Quilt Update #8


I finally figured out how I'm going to lay out the circular Gallifreyan text images. I intend to cut a wide strip of fabric to attach to the right side of the TARDIS quilt, apply fusible web to the backs of the circles, and fuse them to the strip in a semi-circular pattern. It should be easy, right? A 1-day project. So, I thought today would be the day.

The answer to the earlier question is that it's not as easy as it seems, not when you print your first page of images and realize that you're out of ink! My printer has three separate ink cartridges for color, and they're all low. Sadly, I didn't realize they were low until I printed the first page of images where the tan fabric background came out with some green stripes. I don't remember any green in the Doctor's tweed plaid jacket! So, I'm halted again, waiting for a new order of fusible fabric to be shipped to me (because the page I ruined leaves me without enough pages to print all my images). Tomorrow, I take a quick jaunt to Best Buy to pick up three ink cartridges. Ah well, best laid plans . . . .

I do hope to have the quilt finished for the 50th Anniversary episode on November 23rd at the very latest. 


Sunday, September 29, 2013

Doctor Who Quilt Update #7


My 11th Doctor jacket fabric order from Spoonflower finally arrived this week, so that means more sewing! I had planned to work on the Gallifreyan text squares first, but once I had the plaid in my hands all that changed. 

I spent the week thinking about where the bow tie blocks would fit into the quilt and decided on a strip of bow ties on point (arranged point to point) with the block being a 5.5-inches square when finished. Now that the weekend is here - and my horrible cold/sore throat/laryngitis is on the way out - I headed back to my sewing room.

Good contrast between the two fabrics for this block is required to really see the bow tie when the square is finished. I had already decided on red bow ties because the 11th Doctor jacket fabric has a red stripe through the plaid.

The decision about size was an easy one. A long time ago, I found a tutorial on YouTube about how to construct a dimensional bow tie quilt block. The center of the bow tie forms little pockets that give the square some added interest because the center sticks up a bit from the rest of the square. Luckily for me, the tutorial is  still online: 3-Dimensional Bow Tie Block (just under 9 minutes). I would have preferred to embed the tutorial here, but I just couldn't get it to work. It's worth using the link to see the block constructed, though.

The bow tie square is constructed from 5 squares, 3 that form the bow tie and 2 for the background. The woman conducting the tutorial warns about using squares smaller than 3-inches, and if you watch the tutorial, you will see why. The center square for the bow tie gets scrunched during construction. Anything smaller than a 3-inch square would be impossible to sew and would definitely get lost!

In the tutorial, the bow ties have pointy ends, as you can see from the screen shot below from the tutorial. As we all know, the Doctor's bow tie is not pointy!


 Tutorial Bow Tie Quilt Square

I wanted a bow tie that sort of looks like the Doctor's, so I took the bow tie block once step further. I cropped off the pointy ends and replaced them with more plaid background fabric. As much as possible, I tried to line up the red lines in the plaid. 


The first image below shows the finished bow tie block with 2.75-inch squares of plaid background pinned in place over the pointy ends of the bow tie (right sides of the fabric are together). I drew a pencil line across the block to guide my sewing.

 2.75-inch background square overlaying the quilt block


The next step was to sew along the pencil line. I was VERY careful before doing this step because I wanted the red lines in the plaid to line up with the red lines you can see in the background fabric on the other side of the block. Even though I checked and double checked, I still had to pull out some stitches, reposition the small square and resew the seam - several times! Thank goodness for a sharp seam ripper.


 Seams sewn in matching red thread


After sewing, I flipped the square over on itself, pressed the seam down, and cut off the fabric under the background fabric. There are actually three layers of fabric before the trimming is complete, and you need to eliminate the two bottom ones to control the bulk in the block. With the dimensional center to the bow tie, there's more than enough bulk already.

 Small background fabric squares pressed and trimmed


Here's the finished block below. I poked the eraser of my pencil into one of the "pockets" formed at the center of the bow tie. Each edge of the center square is also open like this one.


Completed bow tie block with dimensional center


The next step is to form the bow ties into a strip that can be sewn into the quilt. I decided to put the bow tie blocks on point.

 Four bow tie blocks arranged "on point" 


I also had to decide what the strip was going to look like. With the bow ties set on point, the quilt strip is made up of smaller strips set at a 45-degree angle. I chose a dark blue star fabric to add contrast and bring some blue into the strip. I did audition other fabrics in my stash, but nothing worked like that blue one.

There was a lot of sewing and trimming involved in making this strip, which I've shown draped along two chairs below.


  Finished bow tie strip


In the next image, you can see one of the diagonal strips that make up the larger, long strip that will go into the quilt. The bow tie block is set on point in the center of the strip, and the triangle at the lower left and upper right make up the rest of the small strip. Actually, constructing it is several steps, too. The bow tie block was 5.5-inches square before I set it into the small strip, so I cut  two 5.5-inch squares from the dark blue star fabric for each strip. When the sewing was done, what looks like triangles were really squares sticking up at the top and bottom that had to be trimmed down to triangles. I did the trimming carefully using my rotary cutter and 24-inch quilting ruler, cutting away part of each dark blue square exactly 1/4-inch from the top and bottom points of the bow tie block. I'm saving the scraps in case I need them later in another part of the quilt.

 
Part of the bow tie strip showing construction of smaller diagonal strips,
running in the image from lower left to upper right


Once the bow tie strip was done, it was about 60-inches long. Time to add it to the TARDIS section! I also had to add batting and some backing fabric, the same planet fabric I used on the back side of the TARDIS section, so there are lots of layers here.Under the TARDIS section (that you can't see the next picture) is pinned from the bottom up: a strip of batting and a strip of backing fabric; the TARDIS section has three layers (the backing, batting, and TARDIS on the top); then on top of the TARDIS section is pinned the bow tie strip. There are six layers in all that have to sewn together carefully. Here they are pinned with the bow tie strip flipped over so you can see what it will look like after it's sewn.


 All layers for the bow tie strip pinned in place


With all those layers, sewing is slow and somewhat tedious. You have to sew with the underside of the bow tie blocks showing up. This is necessary because to keep the nice points on the bow tie blocks that you worked so hard to achieve, you have to sew the long seam joining the bow tie strip and the TARDIS section exactly 1/4-inch from the edge of all six layers of fabric and right next to the points of the bow tie square. By sewing with the underside of the bow tie strip showing, you can see the red thread coming to a point in the corners of the block and sew right into the point. When you flip the strip, the points are still there and perfect! Nothing else will do. If you chop off a point, you have to rip out the seam and resew it until it perfect!

 
 Close-up of one bow tie block with nice points in the four corners of the block.


So, finally, the strip is sewn to the left of the TARDIS section. The long seam is pressed, and I'm back to three layers again in both sections. In the picture below, only the quilting is left for the bow tie strip. Each blue triangle has a straight pin in it to keep the layers together. But here it is! Another section completed!


  Two sections of the quilt completed with the bow tie strip ready to quilt


Well, I won't be able to procrastinate on the Gallifreyan text squares any longer. There are some decisions to make, though. How large will the text square be? I originally thought the squares would be 4-inches finished, but now I have to decide whether I want them the same size as the bow tie blocks, which would make the Gallifreyan strip the same width as the bow tie strip. However, I don't have a lot of that dark blue star fabric left, having used over half the 1-yard piece with which I started. I have some scraps, but will they be enough? Maybe, the Gallifreyan strip should have a red background instead of dark blue to bring some of the bow tie fabric over to the other side of the quilt. Also, I have eleven Gallifreyan text images I want to use, so maybe, the text blocks should be smaller so I can fit all of them on the right side of the TARDIS. Maybe, I can have the strip underneath (and above?) the TARDIS as well as to the right. See? Lots of things to think through before I start cutting fabric.  So, until I figure out what's next, have a good one!


Sunday, September 15, 2013

Doctor Who Quilt Update #6


What to do on a rainy day? Quilt, of course! And, it's high time, too. It's been a while since I worked on my 11th Doctor quilt, but I got to it today, working on the "mechanical," but important, stuff rather than the creative stuff.

The center of the quilt, the TARDIS itself, is now almost completely quilted, just have to figure out how I want to quilt the light.

Here's the TARDIS layered on batting and backing, pinned in place, laid out on my work table and ready to quilt. 


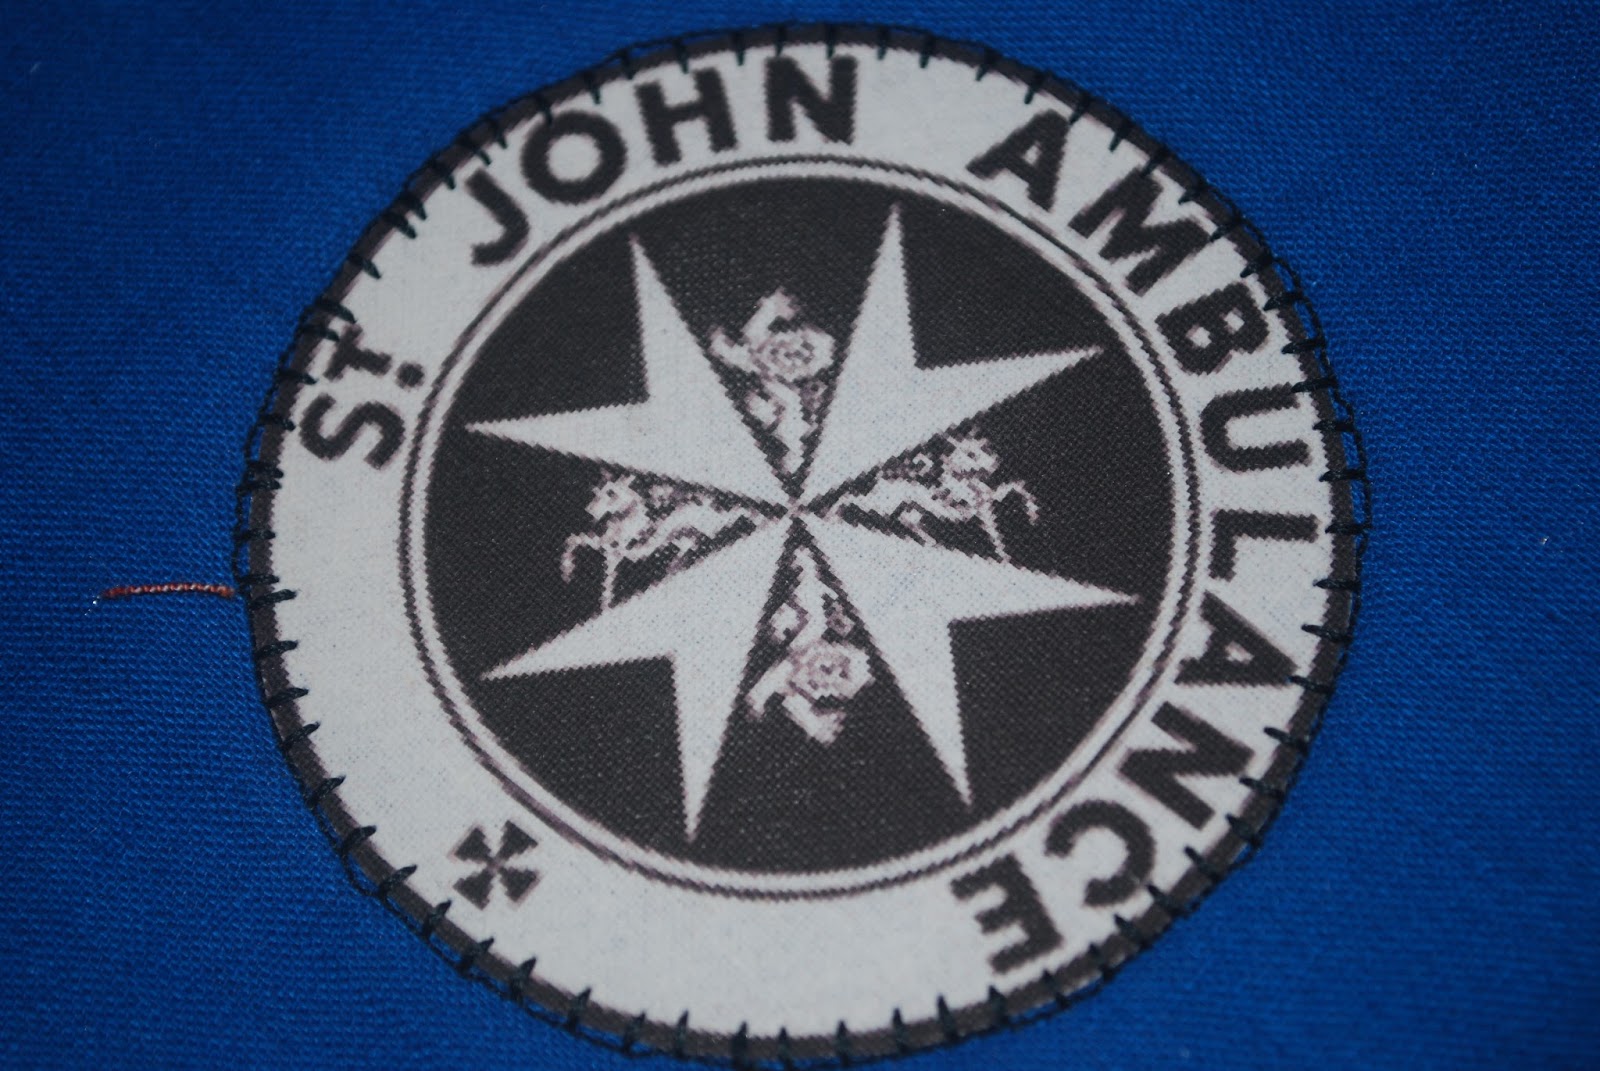
Frankly, I enjoy the piecing more than the quilting, which is part of why it took me so long to get into this step. Before I pinned the quilt down, though, I did some stitching around the panes of glass and around the St. John Ambulance decal. I used a machine stitch that looks like a blanket stitch on both areas.


I wanted to make sure they stayed put over time. The decal is held down with transfer adhesive, and the tulle is sewn into the seams, but you never know! Better safe than sorry later. 

Today, I quilted the vertical and horizontal seams. As I said earlier, I still have to decide on how to  - and how much to - quilt the light, but the center section of the quilt is essentially done. Here it is! The tiles in the picture are around 12-inches square, which gives you an idea of the center panel's dimensions.


 Quilting done!


 Baptism by cat!


 Backing fabric: Planets are cool!


Now that the center panel is essentially finished, I can start planning the right and left panels. I have several options: (1) Create a rectangular border of red bow tie squares; (2) Create a rectangular border of the Doctor's plaid jacket fabric interspersed with the Gallifreyan text images; (3) Somehow combine bow ties and Gallifreyan images together into one rectangular border: or, (4) Create something asymmetrical using both bow ties and Gallifreyan images. And, that what just come to me at the moment. I'll need some time to think about it. I suspect I will create the individual bow tie and Gallifreyan squares (4.5 inches) and place them around the center panel to find a look I like before I do any actual sewing.


Whatever, I decide, I'm still waiting for my order of the Doctor's plaid jacket fabric to come from Spoonflower, and I have to finalize my Gallifreyan images and print them before I can do anything. That should give me plenty of time for thought. 

Tuesday, September 3, 2013

Doctor Who Quilt Update #5


I spent a lot of time the last couple of days playing around with the Gallifreyan text images. I'm never quite satisfied and keep making changes. It's hard to remember that there's really not "right" way to write in Gallifreyan. The system I'm using is from Loren Sherman at Sherman's Planet. It's a good system and the directions are clear. However, there's also opportunity for the personal, artistic touch of the person doing the writing.You do have to get the letters right, though! 

Here are the latest versions of two squares I've come up with. There are eleven (of course!) altogether.


I don't have an expensive image editor, so here's how I did it.

First, using the PDF Guide to Gallifreyan from Sherman's Planet, I created the images in MS Paint. Simple, but effective. Then, I saved each image as a .jpg file. But, I really needed a transparent GIF for the quilt squares. So, I also saved the Paint file as a GIF and used the TransWeb Transparent-GIF Service from MIT. You have to have a place online to store your images as the service requires a URL for the image in order to work. I don't know what I'll do if this service is ever discontinued! I've used it before to great effect. 


I had already created the tweedy-looking image by manipulating a scanned image of real fabric. Using PowerPoint, I layered the transparent GIF over the tweed image and added the text label. I made a separate slide for each GIF and saved them as .jpg's in a separate folder. PowerPoint lets you save all or just a current slide as a .jpg. It's a great time-saver. VoilĂ ! Text images! They're not very fancy, granted, but they are in keeping my one rule for this quilt: "Simplify! Simplify! Simplify!" 

Once I'm done fiddling with the look of the images, I will insert all of them into a word document (to get more than one image on a page, something my image printing software can't seem to do . . . though it might be me. LOL!). And, PRINT! On printable fabric, of course, which I've already written about earlier, so I won't say more here.

I have been thinking about putting them into the quilt by hand appliquing each circle, but that seems like the opposite of "Simplify!" so it's not a serious option right now. 

The simple way to do it is to use squares. The squares will be 4.5" X 4.5" when printed, the same size I'm planning for the bow tie squares. Then, I'll have to figure out where I want them in the quilt. Oh, well! Another decision to make!